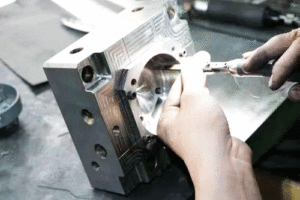
Polishing Treatment for Plastic Molds
Polishing Treatment for Plastic Molds With the widespread application of plastic products, such as daily-use items and beverage packaging containers, there is often a requirement
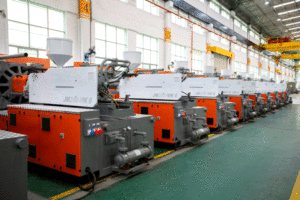
Injection molding is a molding method including injection and molding. Its advantages are:
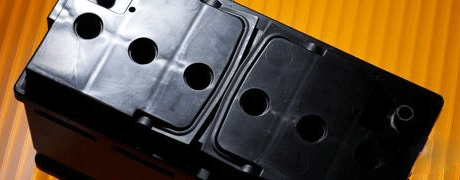
Injection molding is suitable for mass production and complex shape products and other molding processing fields.
In the daily injection molding process, we often encounter various quality problems. The quality problems of injection molding products include minor surface defects and more serious quality problems.
And they will affect the performance and safety of the products. And they are usually caused by problems with the molding process, material usage, mold design, or a combination of the three. Optimal process settings are critical to final productivity levels, part quality and final injection molding cost. Today, we will systematically analyze the common injection molding problems and solutions. And this topic is divided into 2 Parts.
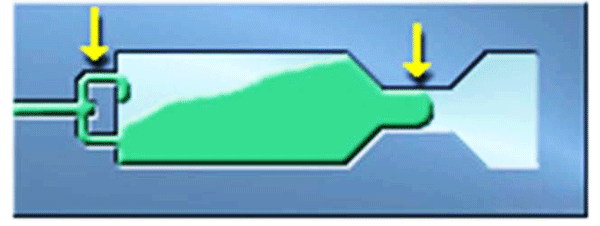
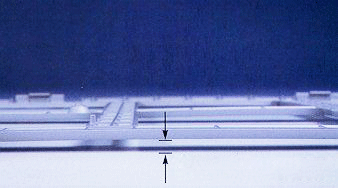
Short shots occur when the flow of molten material does not completely fill the cavities in the mold. Then, it results in an incomplete molded part after cooling. Usually, this will cause the thin walls (or combinations), or molded parts filled with polymers to be far away from the gate, especially for the long flow distances, resulting in functional or appearance defects in the product.
Jetting refers to a deformation of the molded part. When an initial “jet” of molten material is injected into a mold cavity, the air within that cavity begins to solidify before the cavity fills.
Jets typically appear as wavy lines on the surface of the finished part, usually starting from the initial gate of the injection. This visible flow pattern could lead to some weakness.
When molten polymer or other material is injected under high pressure through a small gate, it usually spews out of the gate quickly rather than gradually filling the cavity.
As the first line of this material cools the mold walls and begins to harden, the remaining mold material pushes it, leaving an impression on the surface of the finished part.
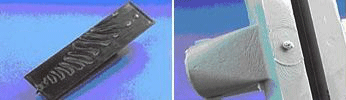
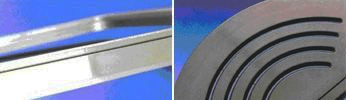
Flash (also known as “splatter” or “burr”) is excess molding material that appears as a thin lip or protrusion at the edge of the component. Flashing occurs because material has flowed out of the intended runner and into the space between the tool plates or at the injector pins.
Flash usually appears near seams, sealing surfaces, exhaust passages or injectors.
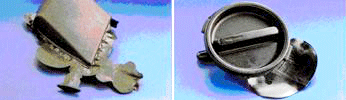
Sink marks are an aesthetic flaw in the surface. They appear as depressions, usually in thicker parts of the molding. The root cause is usually shrinkage of the material during crystallization.
Sink marks are mainly caused by thermal shrinkage (shrinkage) during cooling. After the outer material cools and solidifies, the inner material begins to cool. Its shrinkage pulls the outer material (surface) inward, causing sink marks.
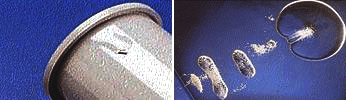
Voids appear in moldings as small air bubbles or bubbles, usually created by air, gas, or vacuum. If the item is highly transparent, the voids become more noticeable. One of the main reasons for voids is that the molding pressure is not enough to force entrapped air out of the mold cavity.
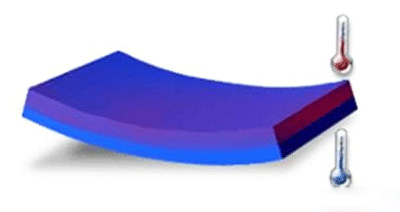
Warpage is a deformation that can occur in an injection molded product when different parts of the part shrink unevenly. Just as wood warps when it dries unevenly, plastics and other materials warp during cooling.
Because uneven shrinkage can put unnecessary stress on different areas of the molded part. This undue pressure can cause the finished part to bend or twist as it cools. One of the main reasons for warping of injection molded plastics and similar materials is that cooling occurs too quickly. Excessive temperature or low thermal conductivity of the molten material can exacerbate the problem.
Burnt marks are defects caused by polymer degradation during injection molding, resulting in black or rust-colored discolorations on the edges or surfaces of molded plastic parts.
Discoloration or “staining” occurs when a molded part has a different color than expected. Often the discoloration is confined to a localized area or a few unusual lines of color on the molded part. This defect usually affects the appearance of the part without reducing its strength.
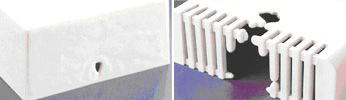
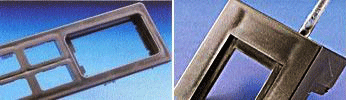
Weld lines represent the optical and mechanical defects in molded parts. Weld lines typically appear in the areas where the polymers flow together during the injection molding process. Flow marks appear due to flow turbulence during injection.
Weld lines may appear on the surface of the molded part where the molten material converges after it has split into two or more directions in the mold. Hair-like weld lines are the result of weak material adhesion, which reduces the strength of the part.
Polishing Treatment for Plastic Molds With the widespread application of plastic products, such as daily-use items and beverage packaging containers, there is often a requirement

Injection Molding Techniques for TPE and TPR Injection Molding Techniques for TPE and TPR 1. Dry the TPE and TPR material before injection molding It
Winter Maintenance Measures for Injection Molding Machines As winter approaches and temperatures gradually drop, a cold chill envelops the earth. While ensuring personal warmth, it
Assessment Regulations for Mold Trial Exceeding 3 Times Assessment Regulations for Mold Trial 1. Purpose The purpose of this regulation is to standardize the work of